
Views: 0 Author: Site Editor Publish Time: 2025-11-20 Origin: Site
What if the secret to a smooth, stress-free kitchen is simply choosing the right layout? A smart kitchen layout boosts efficiency, comfort, and even home value. Today, more homes are moving from the old “work triangle” to flexible kitchen zones. In this post, you’ll learn the best layout types, key design rules, storage tips, and real-world examples to help you plan your perfect kitchen.
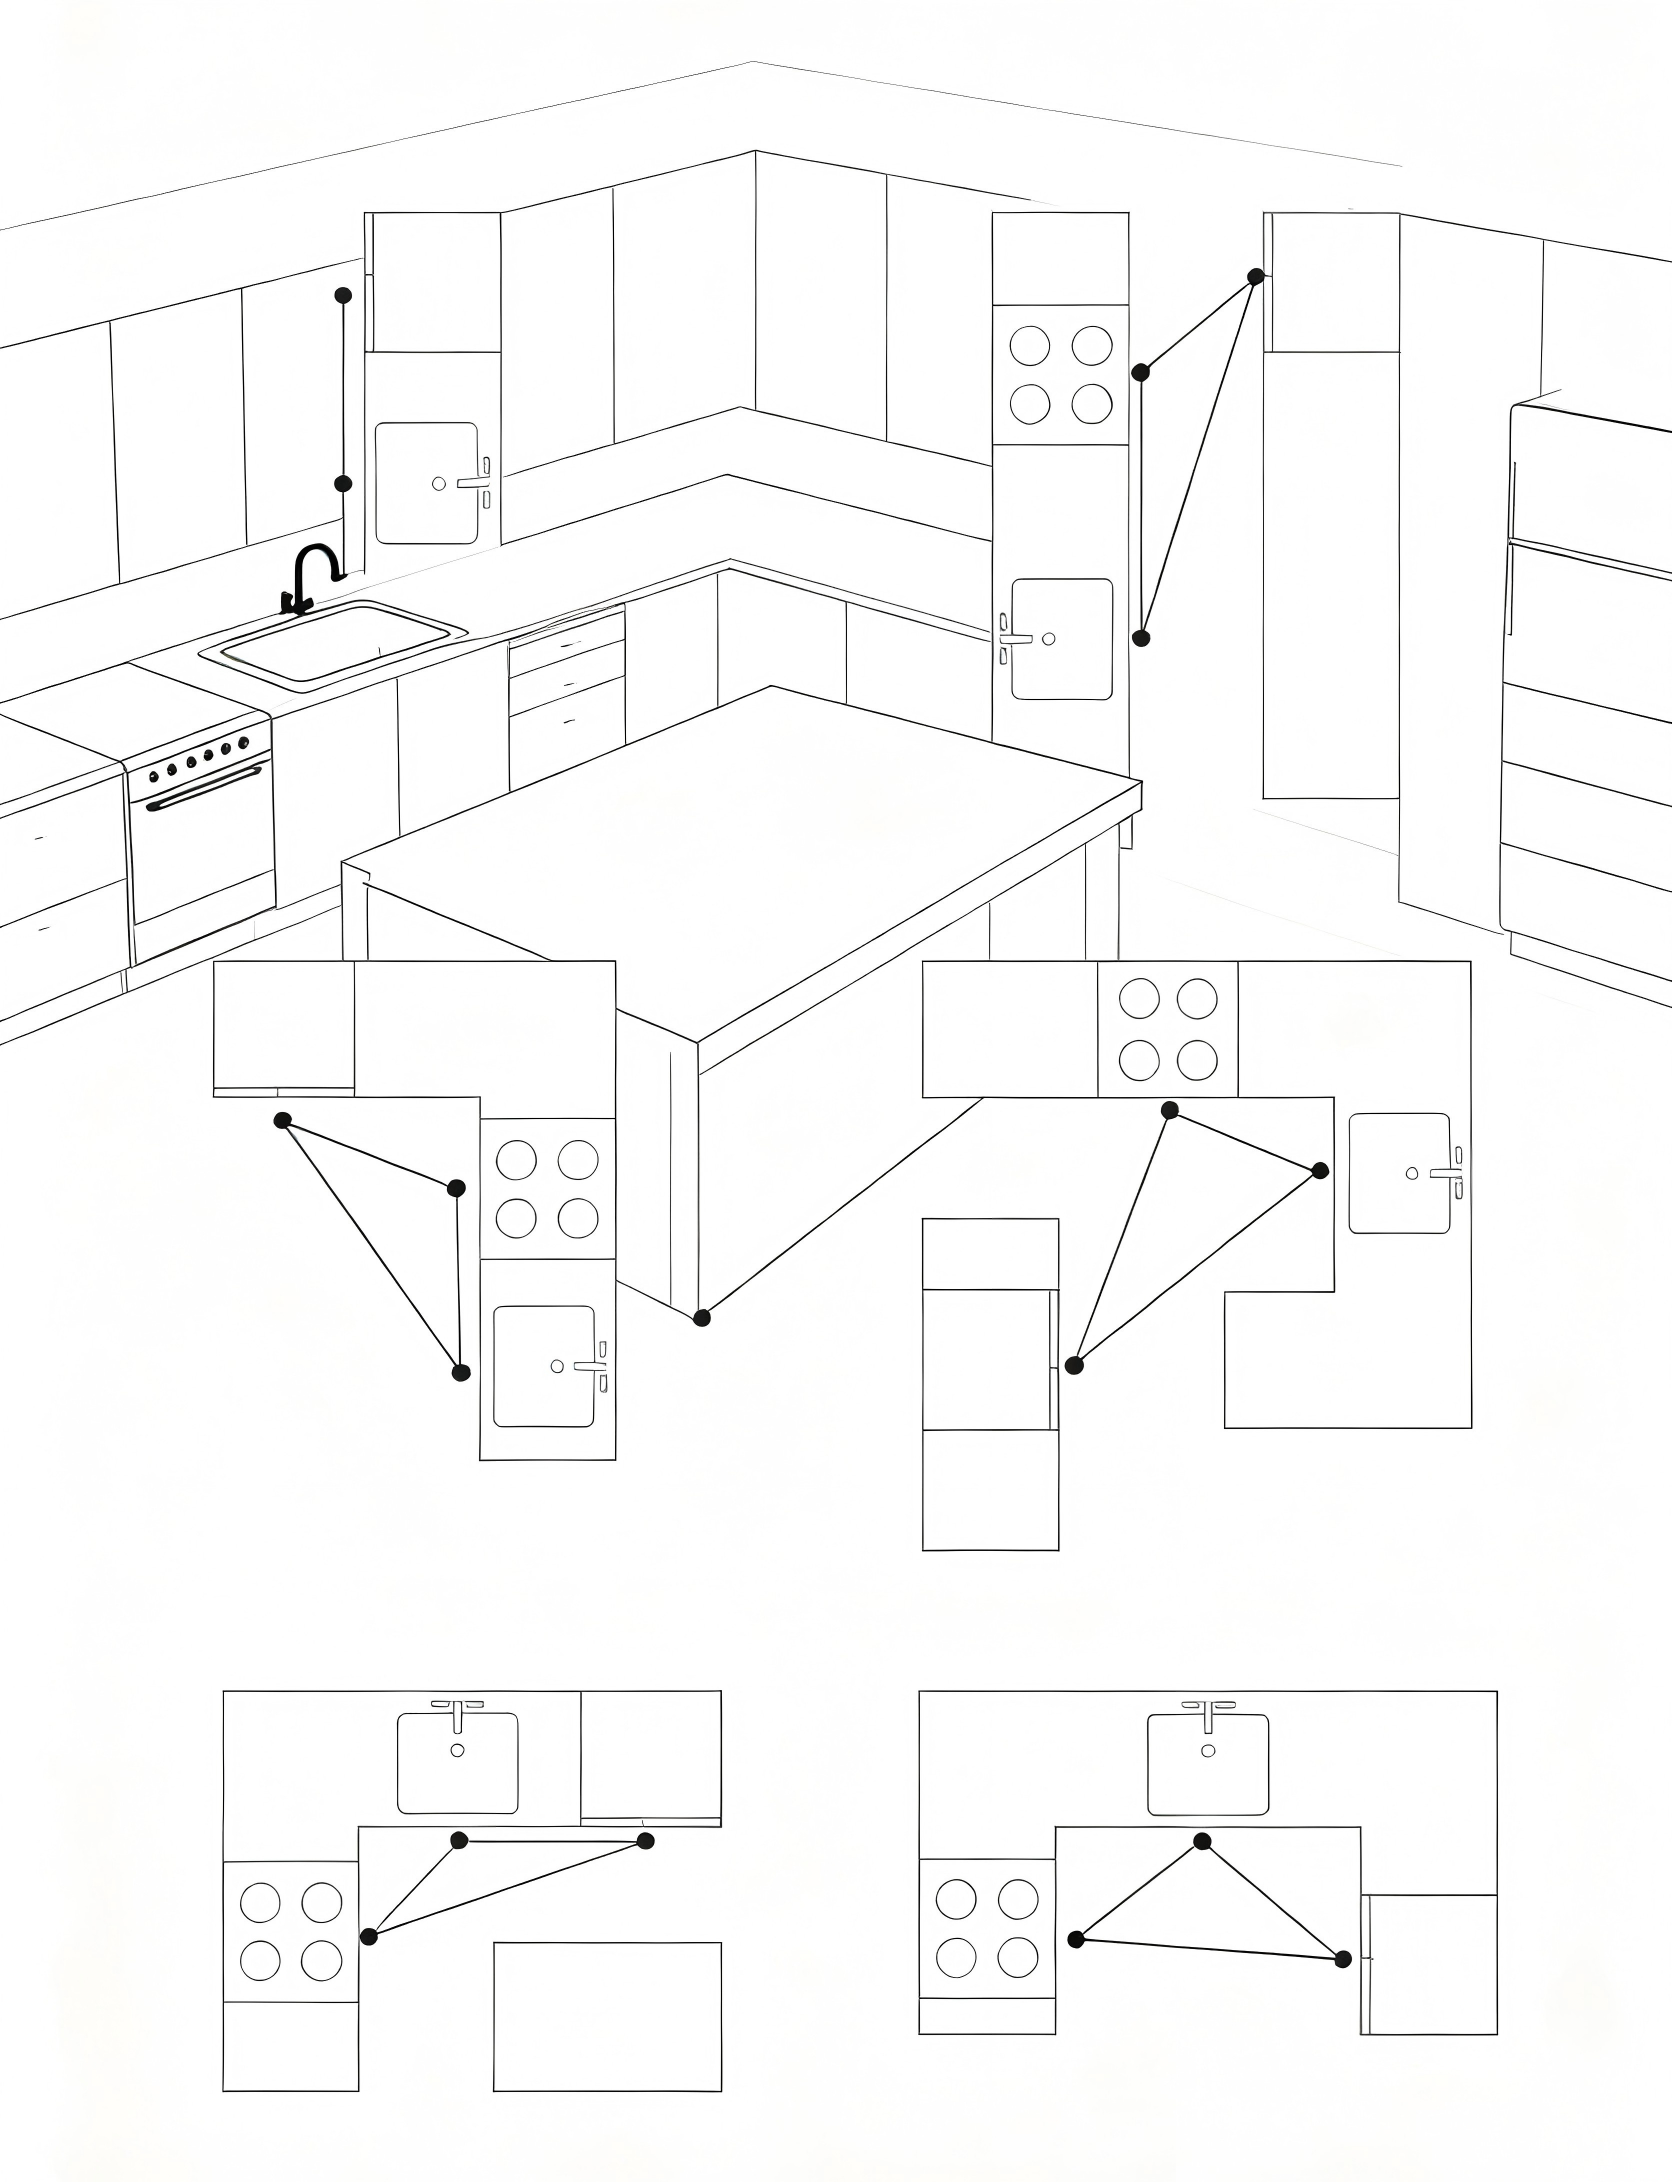
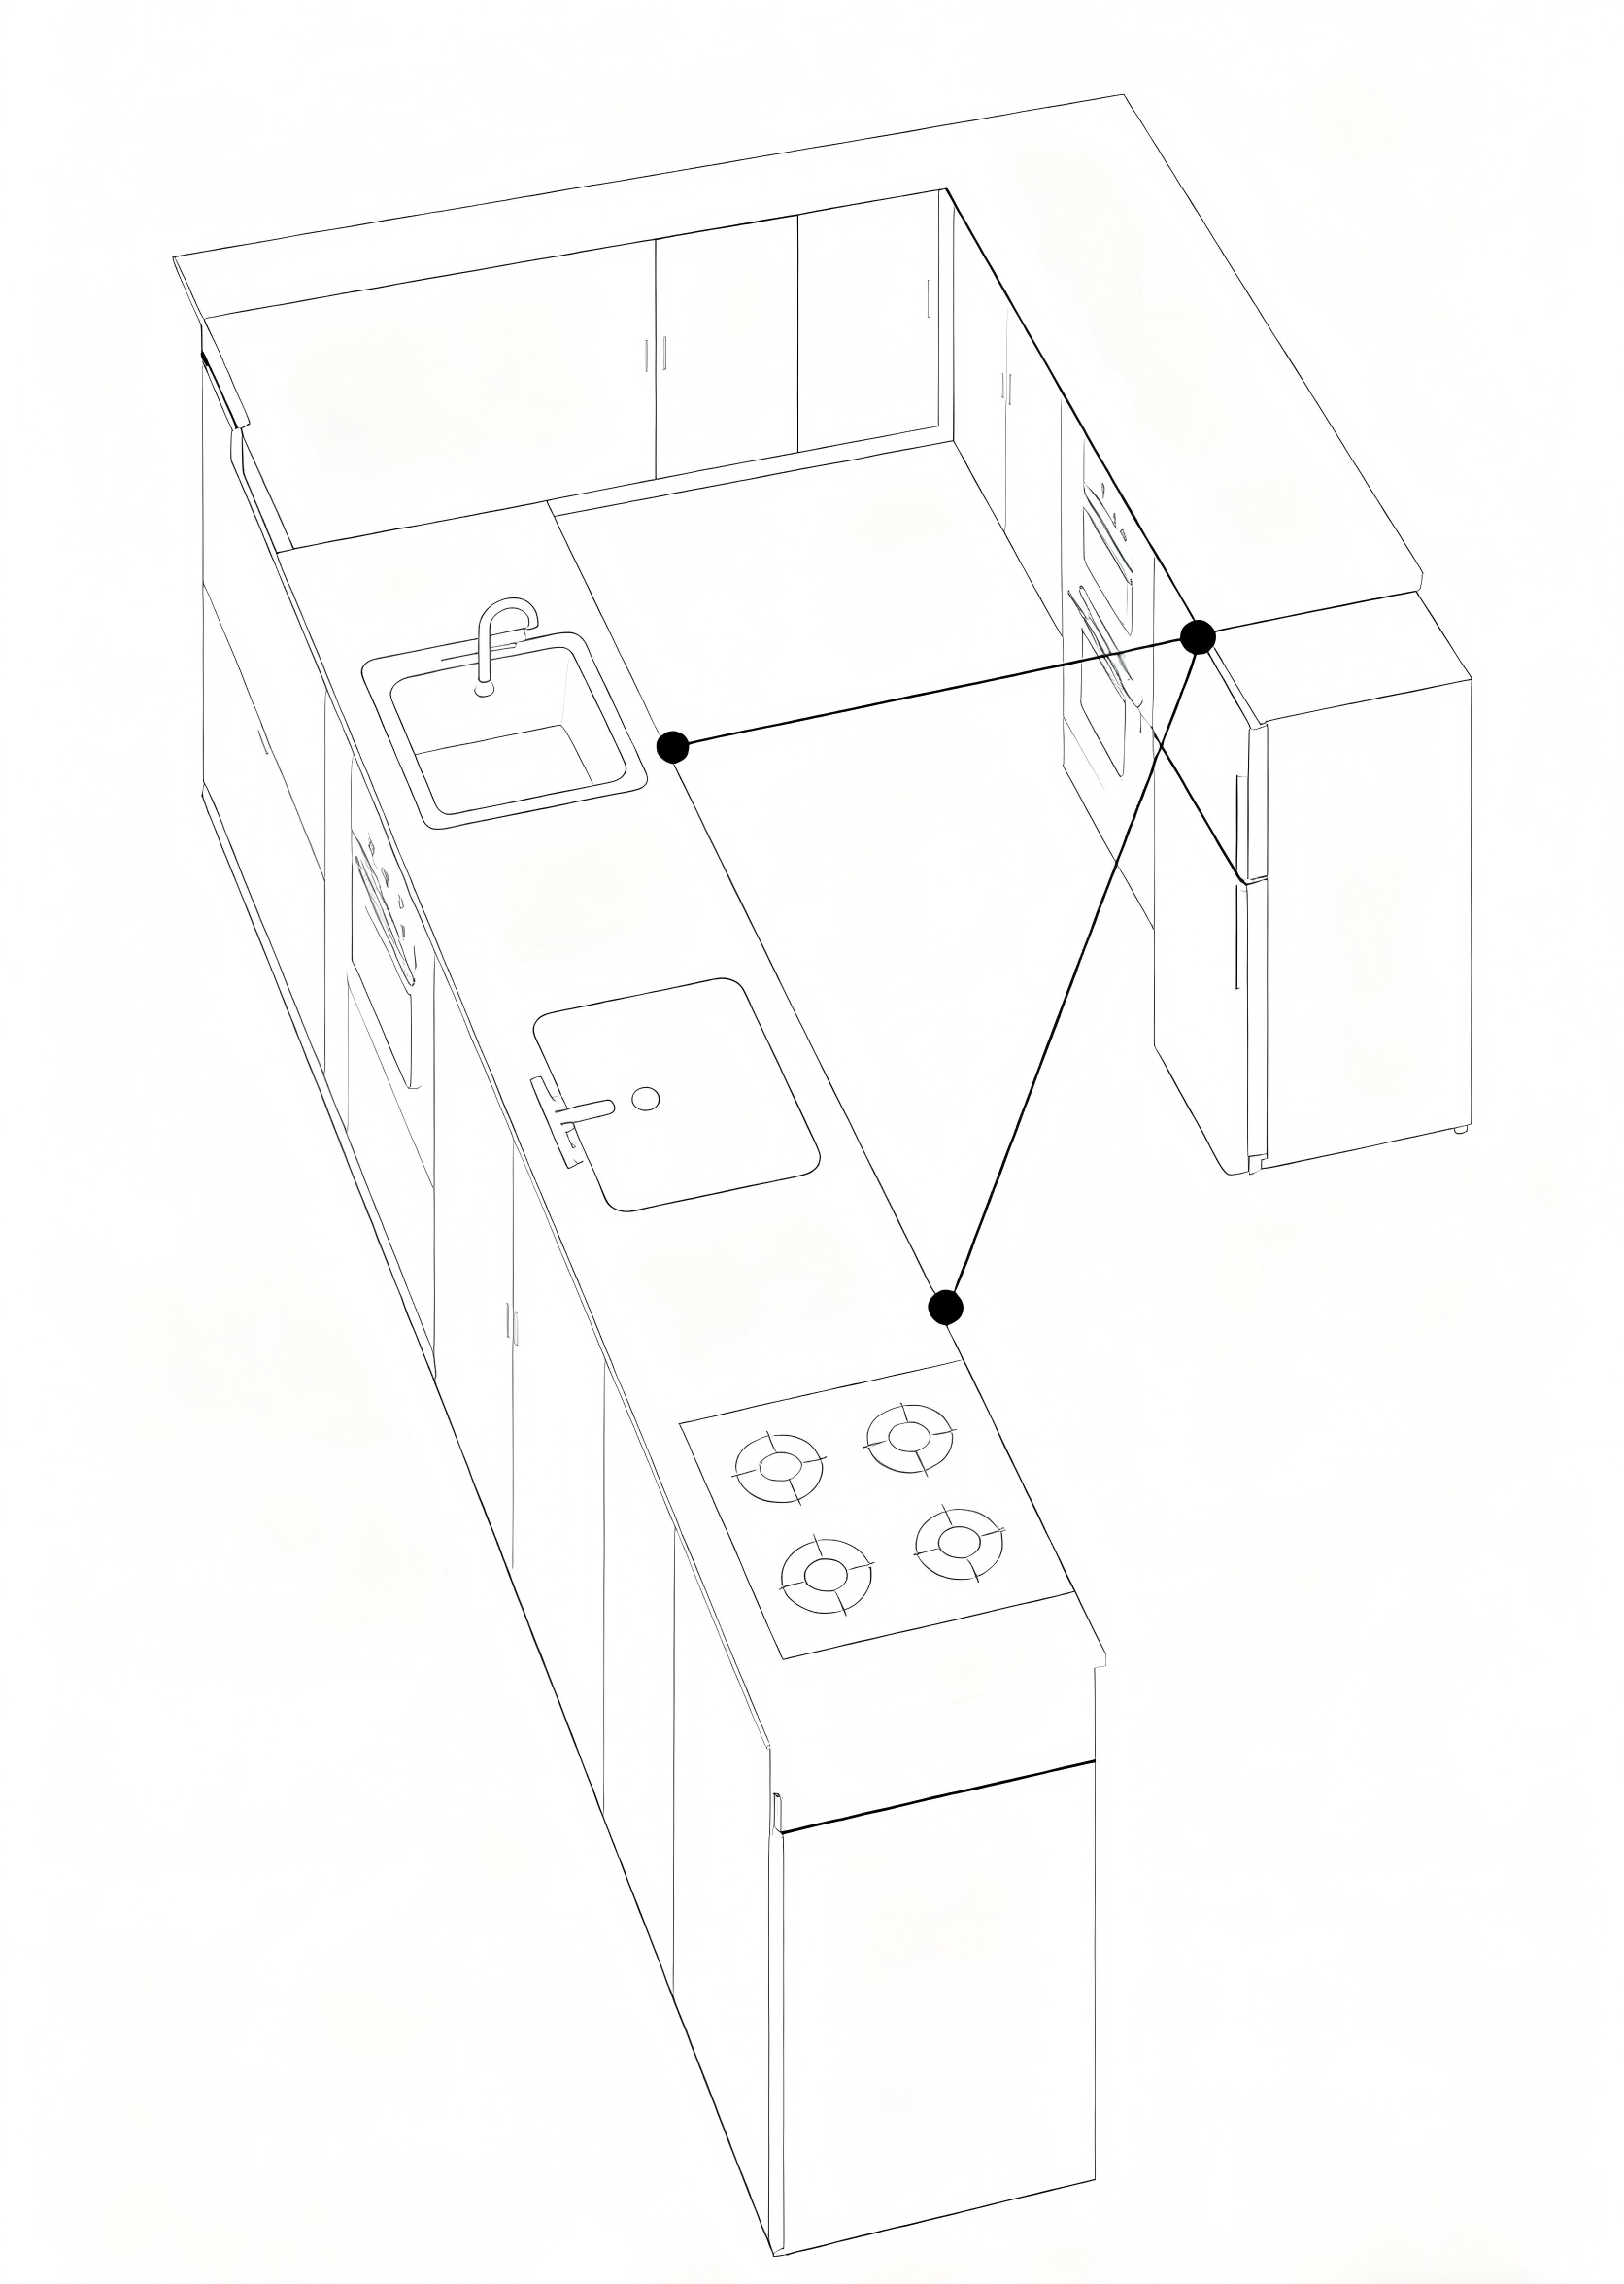
A good kitchen layout makes cooking feel smooth instead of stressful. It shapes how you move between the stove, sink, and fridge—often called the “work triangle.” Many modern homes now use “kitchen zones,” where each area supports a task like prepping or cleaning. When the layout fits the way you cook, everything stays within easy reach and the space feels natural to use.
The layout also controls how much storage you can get. It affects cabinet depth, where tall pantry units can go, and how much space an island can hold. In a galley kitchen, you may rely more on vertical cabinets. In an L-shape or U-shape layout, storage spreads out across walls and corners. These choices decide whether you have room for big pots, deep drawers, or pull-out organizers.
Examples of layout-based storage differences:
| Layout Type | Storage Strength | Common Limitations |
|---|---|---|
| One-Wall | Tall cabinets, simple drawers | Limited base cabinets |
| Galley | Efficient lower cabinets | Less room for tall pantry |
| L-Shape | Flexible corner storage | Needs good planning for appliances |
| U-Shape | Maximum cabinet space | Can feel tight in small rooms |
| Island Layout | Deep drawers, added pantry | Requires wide aisles |
Safety is a major reason layout matters. Your aisles need enough clearance so people don’t bump into open doors or each other. Good planning prevents the oven door from blocking the walkway or the fridge from hitting a wall. Ergonomics—how easy it is to reach and move—plays a role too. Universal design or ADA guidelines help make the space safer for kids, older adults, and anyone with mobility needs.
Typical safety clearances:
36" minimum walkway
42–48" for two-cook kitchens
Safe landing zones near appliances
Buyers in 2025 look for kitchens that feel open, bright, and easy to use. A smart layout increases home value because people want practical flow, good storage, and space for socializing. Open-concept plans, island seating, and flexible zones are popular trends. A layout that supports cooking, gathering, and organization will appeal to future buyers and keep your kitchen feeling modern.
A one-wall layout places every appliance and cabinet along a single wall, making it perfect for studios, small apartments, or open-concept spaces. It keeps everything simple and easy to reach. The downside is limited counter space and fewer storage options. Many homeowners boost storage by adding tall pantry cabinets or deeper base cabinets for extra room.
Pros
Space-saving
Affordable to build
Easy appliance placement
Cons
Limited counter space
Fewer lower cabinets
Best Uses
Apartments
Secondary kitchens
Minimalist designs
A galley layout uses two parallel runs of cabinets, creating one of the most efficient cooking setups. Everything stays close, so cooking feels fast and organized. The challenge is traffic—too many people walking through can cause bottlenecks. Some homeowners open one side to improve flow or add a pass-through.
Traffic Tips
Keep the work zone on one side
Maintain at least 36–42" walkway clearance
Best Uses
Narrow homes
Busy cooks who want efficiency

An L-shaped layout fits naturally into medium-sized kitchens. It opens the room and works well with an island. To keep the space comfortable, aisles should stay wide enough for two people to move around without bumping into open doors or drawers.
Best Features
Great for multitasking
Flexible appliance placement
Works well in open layouts
Island Compatibility
Ideal when the room is wide enough for a 42–48" walkway.
A U-shaped layout wraps cabinets around three walls, giving you maximum storage and counter space. It’s ideal for cooks who need everything within reach. Smaller kitchens may feel tight, so some homeowners remove one wall or add an island to open the space.
Highlights
Tons of storage
Perfect for multiple cooks
Considerations
Can feel cramped in small rooms
Island works best in larger spaces
A G-shaped kitchen adds a short peninsula to the U-shape, creating more counter space and seating. It’s great for large families or anyone who wants extra storage. The peninsula also helps separate the kitchen from nearby living or dining areas.
Best Uses
Large kitchens
Homes needing added seating or serving space
Flow Tips
Clear 42–48" around the peninsula for smooth traffic.
An island layout brings a central workspace into the room. Islands support prep, cooking, seating, or even a second sink. Multi-level islands add visual interest and help separate cooking and dining tasks. But not every kitchen can fit an island—if the room feels tight, a peninsula may be a better option.
Benefits
Extra prep area
More storage
Social spot for guests
When an Island Doesn’t Fit
Consider a rolling cart
Try a slim island or peninsula.
A peninsula gives you many of the benefits of an island without needing as much space. It adds extra seating, storage, and a clear work zone. This layout is especially useful in small or medium kitchens where a full island would block traffic.
Why Homeowners Choose It
Great for open-concept homes
Works in tight spaces
Adds seating and storage without widening the room.
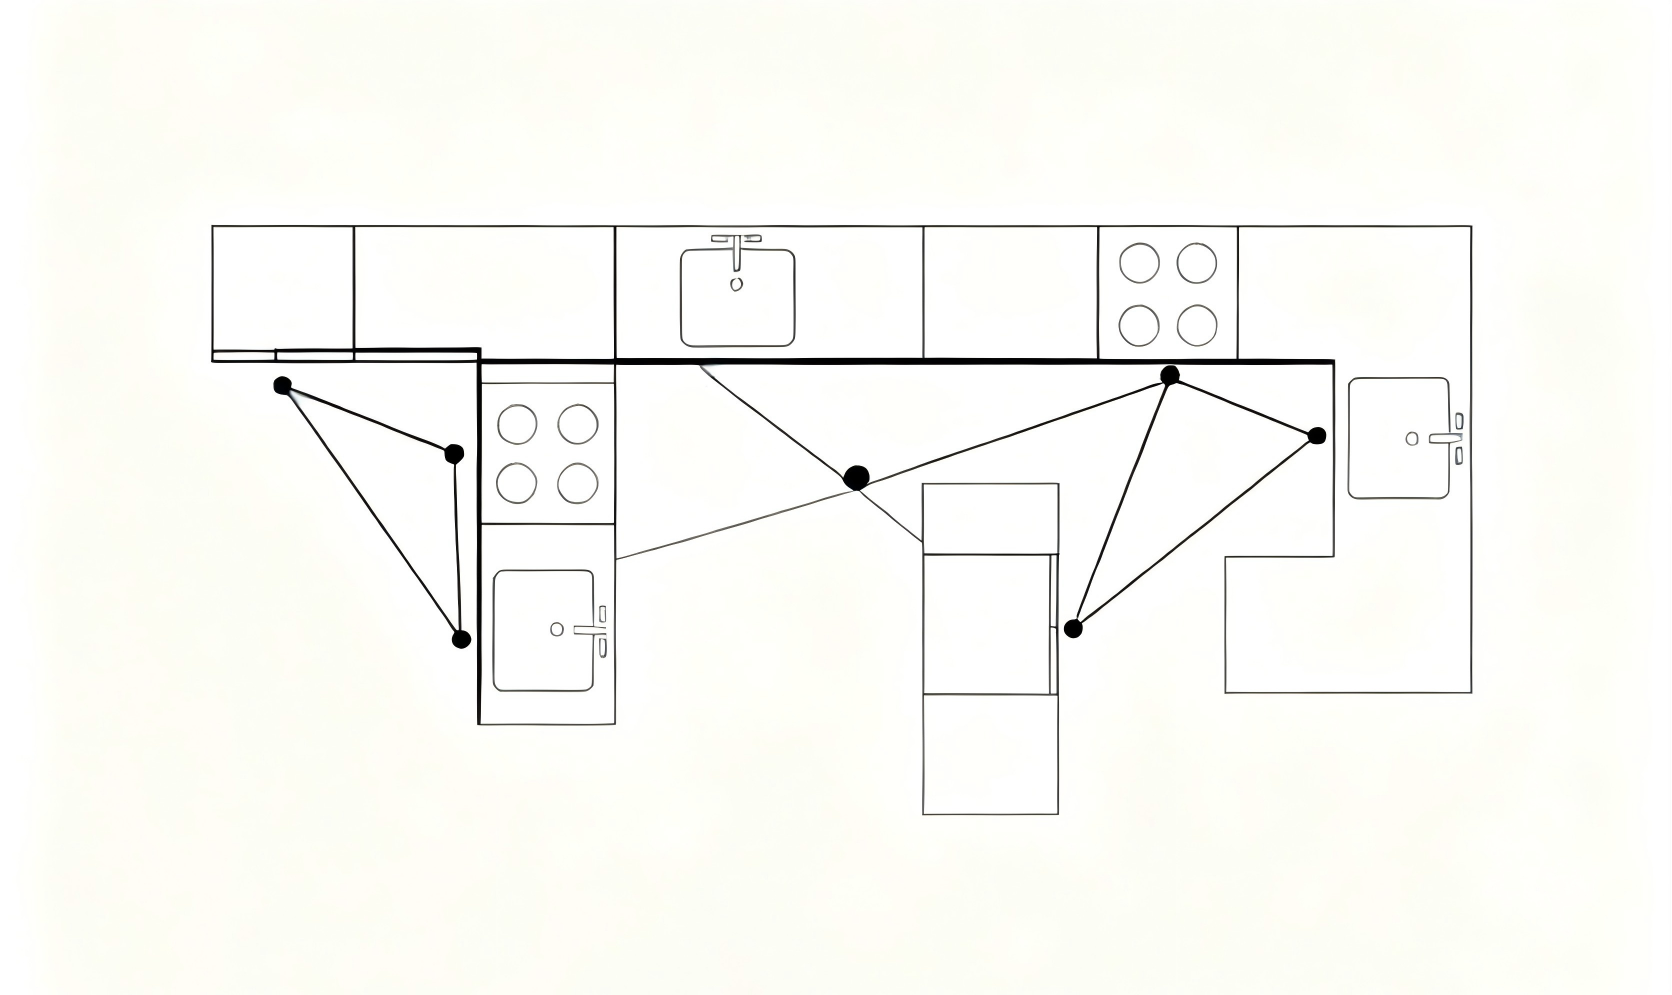
Instead of relying only on the classic work triangle, many modern kitchens now use “zones.” Each zone supports a specific task, making the kitchen feel more organized and easier to use. Zones help avoid crowding, improve flow, and keep tools where you actually need them.
The prep zone is where most of the work happens—chopping, mixing, seasoning, and assembling meals. It usually sits near the sink or island so you can easily wash ingredients and move straight into prep.
What matters here
Counters deep enough for cutting boards and small appliances
Bright, shadow-free lighting
Tools like knives, bowls, and spices stored nearby
Helpful idea:
Place a drawer stack under the main prep counter for knives, mixing tools, and towels.
This zone centers around heat—your stovetop, ovens, and vent hood. Good ventilation is key so steam, smoke, and odors move out quickly. Heat-safe surfaces, such as stone or stainless steel near the stove, make cooking safer and easier.
Key elements
Stove and oven placement
Range hood or venting system
Pots, lids, oils, and seasonings in nearby drawers
Pro tip:
Keep 12–18" of clear counter on both sides of the stove for hot pans and quick transfers.
The cleaning zone revolves around the sink and dishwasher. This area handles rinsing, washing, drying, and waste removal. A good layout keeps the dishwasher from blocking walkways when open.
What to include
Sink under a window or central spot for easy access
24"–36" landing space around the sink
Dishwasher positioned so you can unload straight into cabinets
Dishwasher clearance
Keep at least 36" of aisle width so the door doesn’t create a traffic jam.
This zone holds food, cookware, and dishes. It combines deep cabinets for large pots, shallow upper cabinets for plates, and tall pantry units for dry goods. The layout determines how quickly you can grab what you need without crossing the whole kitchen.
Storage types
Deep cabinets: great for large pots and mixing bowls
Shallow uppers: better for plates and glasses
Tall pantry: perfect for snacks, baking supplies, and bulk items
Table: Common Storage Depths
| Storage Type | Typical Depth | Best Use |
|---|---|---|
| Shallow Upper Cabinets | 12" | Daily dishes |
| Standard Base Cabinets | 24" | Pots, pans, appliances |
| Tall Pantry Cabinets | 12"–24" | Food, cleaning items |
The social zone is where people gather. It often includes an island, peninsula, or breakfast bar. This area helps connect the kitchen to the living or dining space, making it easier to host guests without crowding your workflow.
Features to consider
Islands for seating and casual dining
Peninsulas for homes without room for full islands
Overhang of 10–12" for comfortable legroom
Open-plan tips
Keep walkways clear
Place seating away from the main cooking traffic
Use lighting to separate work areas from social spots
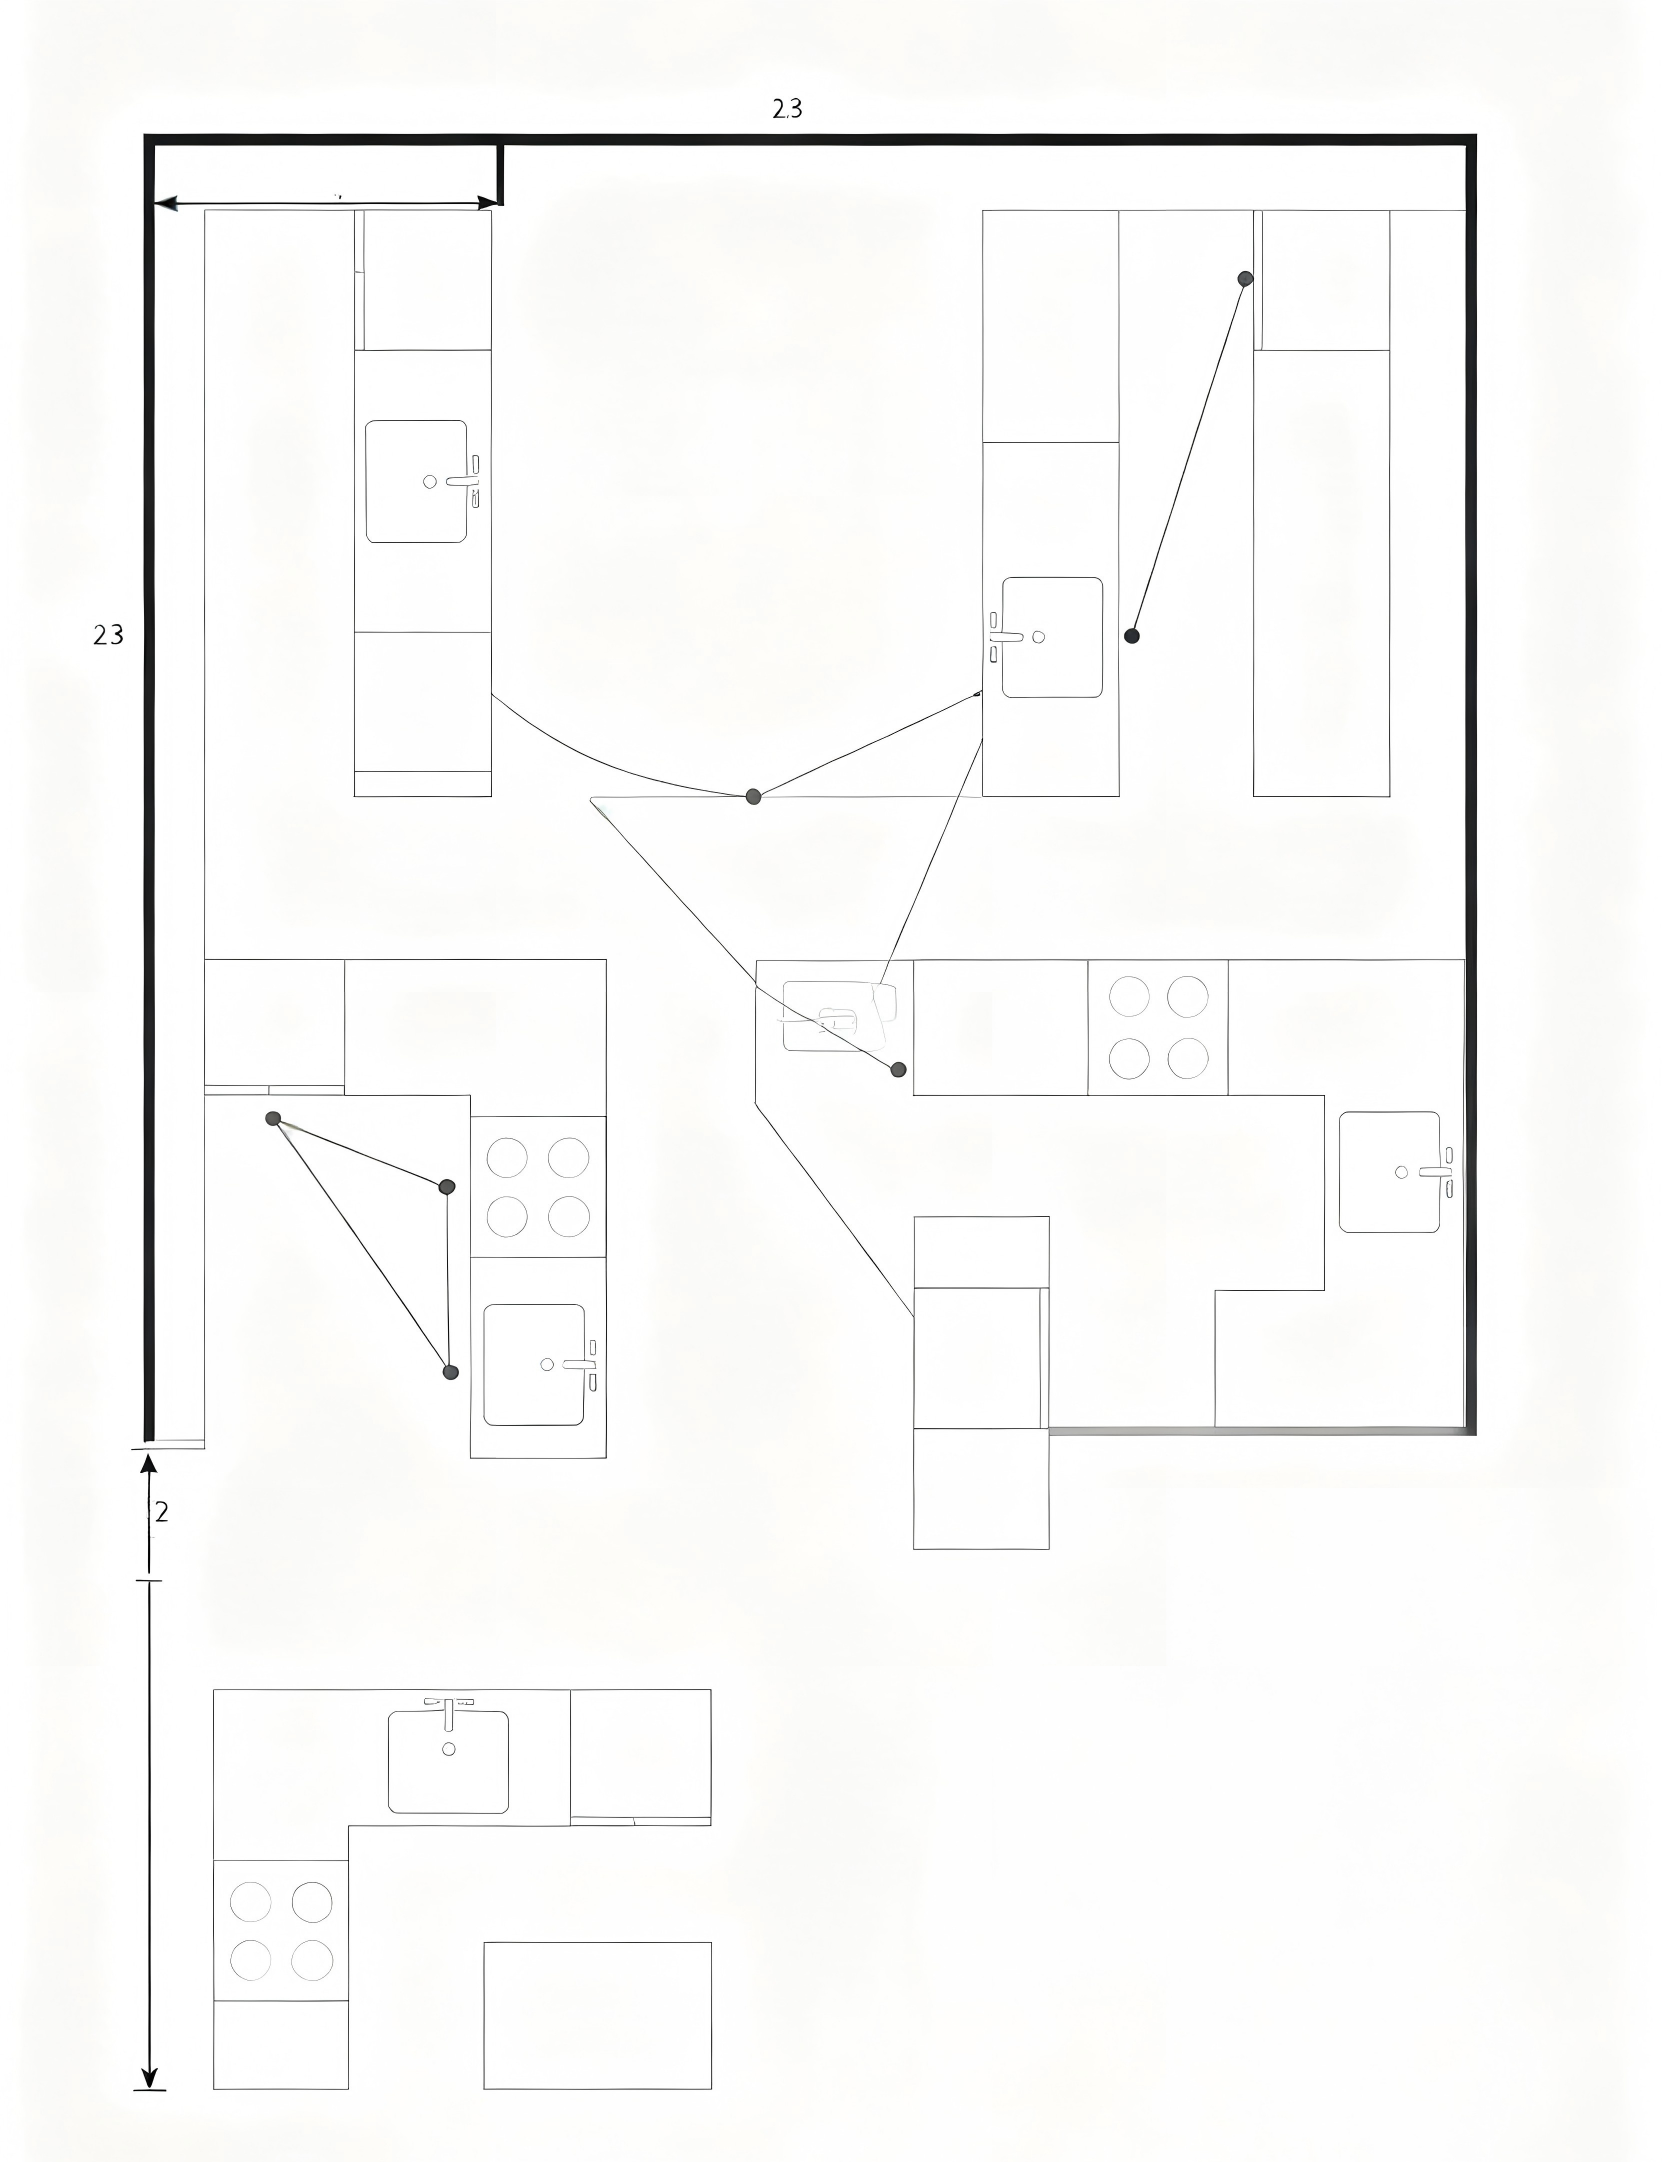
Before picking a layout, start by measuring the space. Write down the length and width of the room, but don’t stop there—include windows, door swings, beams, vents, radiators, and ceiling height. These details affect where cabinets and appliances can go. A small shift in a window or column can change which layout fits best.
What to measure
Full room dimensions
Window and door placement
Ceiling height
Structural elements like beams or columns
Vent and HVAC locations
Every household uses the kitchen differently. A large family may need extra prep space, while a home that loves entertaining may benefit from an island with seating. Serious cooks need generous counter areas and strong ventilation. Multi-cook households need wider aisles so people don’t bump into each other.
Lifestyle examples
Large families: wider pathways, more storage
Entertainers: islands, peninsulas, open seating
Serious cooks: zoning, deep counters, double ovens
Two-cook homes: multiple prep zones, dual sinks
Your appliance plan plays a big role in choosing the right layout. A fridge needs space in front to open fully, plus a landing zone so you can set groceries down. Oven and microwave towers work best when placed near prep and cooking zones. Decide whether you want flush-mount appliances for a sleek look or stand-alone units for easier installation.
Key placement tips
Fridge landing zone: 15"–24" of counter nearby
Oven tower: near prep area but clear of traffic
Dishwashers: next to sink, but not blocking the walkway
Good traffic flow keeps the kitchen from feeling crowded. The NKBA recommends certain aisle widths: 36" for small kitchens, 42" for standard setups, and up to 48" for busy, multi-cook kitchens. Avoid creating a “walk-through kitchen” where people must pass directly through your cooking area.
Aisle recommendations
| Kitchen Use | Ideal Aisle Width |
|---|---|
| Single-cook | 36"–42" |
| Multi-cook | 42"–48" |
| Island seating | 48"+ |
Lighting can make a good layout feel great. Task lighting fits best over prep zones and the cooking area. Ambient lighting brightens the whole room, while accent lighting adds style to shelves or islands. Where you place cabinets, islands, and openings helps decide where lights should go.
Lighting placement ideas
Task lights under upper cabinets
Pendants above islands or peninsulas
Recessed lights for even coverage
Accent lights on open shelves or glass doors
Cabinet depth plays a huge role in how each kitchen layout functions. In a galley layout, shallow wall cabinets keep the walkway comfortable, while standard 24" base cabinets give you enough storage without crowding the aisle. L-shape and U-shape layouts offer more flexibility—you can use standard depths or add extra-deep counters for more workspace. Tall cabinets, like pantry units, fit best on end walls or corners so they don’t break the flow of the room.
Depth considerations
Shallow wall cabinets help open narrow kitchens
Extra-deep counters (up to 30") work best in open layouts
Tall cabinets should avoid blocking natural light or walkways
Each layout handles storage differently, so cabinet depth needs to match the room’s shape. Galley kitchens benefit from deep drawers because wall space is limited. L-shape kitchens handle corner storage well using lazy Susans or pull-outs. Island layouts add the most flexibility—you can mix deep drawers, trash pull-outs, and base cabinets to build a true storage hub.
Best storage matches
Galley: deep base drawers, slim wall cabinets
L-shape: corner solutions, tall pantry units
Island kitchens: multi-depth drawers, seating + storage combos
| Layout Type | Ideal Storage Features |
|---|---|
| Galley | Deep drawers, vertical pull-outs |
| L-Shape | Corner organizers, tall pantry |
| Island | Double-sided storage, extra-deep drawers |
Cabinet depth directly affects how comfortable your walkways feel. If cabinets or counters grow deeper, aisles must grow wider too. For example, in a galley layout, going deeper than standard can make the space feel tight. Island kitchens need even more clearance—enough space for people to walk around while someone else opens a drawer or dishwasher.
Clearance tips
36" minimum for tight spaces
42" for standard layouts
48" for busy, multi-cook kitchens
Deeper counters mean wider aisles
Island seating needs 10–12" overhang without crowding the walkway
Professional chefs live by the idea of mise en place, meaning “everything in its place.” A chef-inspired kitchen uses this same idea by keeping tools, spices, pans, and ingredients within arm’s reach of the prep and cooking zones. The goal is to reduce unnecessary movement. When everything stays close, cooking feels smoother, faster, and safer.
Chef-style mise en place tips
Store knives and cutting boards near the main prep counter
Keep oils, spices, and utensils close to the stove
Use deep drawers for pans and shallow drawers for small tools
Add open shelves for items used constantly
Many modern homes have more than one person cooking at the same time. A dual-cook layout gives each person their own prep station so they don’t get in each other’s way. This usually includes two counters, two sets of tools, and a sink location that serves both sides without blocking traffic.
Elements of a successful dual-cook design
Two prep areas, ideally on opposite sides of the kitchen
A sink placed centrally or with enough landing space for both cooks
Appliances positioned so doors do not collide
Wide aisles (42–48") to prevent crowding
Example dual-cook setup
| Component | Recommended Placement |
|---|---|
| Prep Area 1 | Near sink or island |
| Prep Area 2 | Opposite wall or peninsula |
| Shared Sink | Centered between zones |
| Cooktop | Away from main traffic paths |
Professional kitchens and home kitchens follow different rules, but you can borrow clever ideas from both. Commercial kitchens divide space into “heat zones,” “cold zones,” and “prep zones,” keeping each area efficient and safe. Homes usually blend these zones together, but adopting commercial logic can make cooking much easier.
Key differences
| Feature | Commercial Kitchen | Residential Kitchen |
|---|---|---|
| Heat Zones | Separate area for stoves, grills, ovens | Combined cooking zone |
| Landing Zones | Large surfaces near every appliance | Smaller counters near major appliances |
| Sinks | Often multiple sinks for different tasks | One to two sinks |
| Traffic Flow | One-direction workflow | Flexible, multi-directional flow |
| Ventilation | Heavy-duty systems | Standard hood vent |
How to apply commercial logic at home
Add heat-resistant surfaces near the stove
Keep a landing area beside every major appliance
Consider adding a prep sink, especially in island kitchens
Separate raw prep from cooked food when possible
Small kitchens need smart layouts that stretch every inch of space. One-wall kitchens, mini-L shapes, and compact galley designs work best because they keep everything close and efficient. Vertical storage becomes essential—tall cabinets, floating shelves, and ceiling-height uppers add room without widening the footprint. Shallow cabinets help preserve walkways while still giving enough space for dishes and pantry items.
Tips for small layouts
Use wall-mounted racks or magnetic strips
Choose 12"–15" deep uppers to keep the room open
Add roll-out trays or slim pull-outs for spices and oils
Medium-sized kitchens offer more freedom in planning. An L-shaped layout with a small island creates a natural flow for cooking and socializing. A U-shape with an open end gives you plenty of counter space without making the room feel boxed in. These kitchens handle multiple zones easily, including prep, cooking, and cleaning areas.
Best features for medium kitchens
Compact islands for seating or prep
Corner organizers to avoid wasted space
A mix of deep drawers and upper cabinets
Large kitchens let you use more advanced designs, like double islands—one for prep and one for seating. These spaces also work well with chef-style layouts, where zones are clearly divided to support heavy cooking. Walk-in pantries fit naturally into large layouts and keep the main kitchen clear of clutter.
Large kitchen ideas
Prep island + serving island
Dedicated baking or beverage zones
Oversized range with wide ventilation
Hidden pantry or utility room
Modern kitchen layouts focus on flexibility and blended living. Broken-plan designs divide space with islands, partial walls, or seating nooks instead of full walls. Many homeowners replace upper cabinets with open shelving to create a lighter, more open feel. Appliance garages and hidden storage help keep counters clear without losing function.
Trending features
Floating shelves instead of uppers
Concealed coffee stations and small-appliance garages
Multi-purpose islands with charging drawers
Soft transitions between kitchen, dining, and living areas
Many homeowners dream of having an island, but squeezing one into a small kitchen often creates more problems than benefits. An oversized island can block walkways, limit drawer clearance, and make the room feel tight. If the aisle drops below 36–42", the kitchen starts to feel cramped.
Better choices
Try a slim island or a rolling cart
Use a peninsula when the room is narrow
Keep island width proportional to the space
Appliances need space to open fully without hitting cabinets or people. A fridge shoved into a corner or a dishwasher that blocks a major walkway can quickly ruin a good layout. Always check door swing direction and make sure there’s enough room for landing zones.
Clearance tips
Leave 15"–24" landing space near the fridge
Avoid putting the oven against a wall
Ensure dishwasher doors don’t block traffic
Landing space is the counter area beside an appliance where you place ingredients, trays, or hot pans. Without enough space, cooking becomes awkward and unsafe. The stove, sink, and fridge all need nearby counters to work well.
Recommended landing areas
12–18" on each side of the cooktop
24" around the sink
15" minimum next to the fridge
A layout can look perfect on paper but fail when installation begins. Plumbing for the sink, wiring for appliances, and venting for the range hood must be part of the plan. If these systems aren’t considered, you may face costly rerouting or layout changes later.
Remember to plan
Outlet locations
Water line access
Hood vent path to the exterior
Gas line clearances
Islands and peninsulas often double as dining areas, but seating comfort depends on proper overhang depth. If the overhang is too shallow, knees hit the cabinet. If it’s too deep, the island may crowd the walkway.
General seating rules
10–12" counter overhang
24" width per seat
Allow enough aisle space behind chairs
A kitchen feels brighter and larger when natural light flows through it. Placing tall cabinets or appliances in front of windows can block light and make the space feel closed in. Open shelving, glass cabinets, or shorter units help keep the room bright.
Ways to prevent light blockage
Keep tall cabinets away from windows
Use reflective surfaces near natural light
Add glass cabinet fronts or open shelving
Different kitchen layouts come with very different price ranges. A one-wall kitchen usually costs the least because it needs fewer cabinets, shorter plumbing runs, and minimal electrical work. A galley or L-shape sits in the middle, offering good efficiency without the heavy price tag. The most expensive layouts are U-shapes or kitchens that include an island, since they need more cabinetry, more counters, and often more lighting and electrical upgrades.
| Layout Type | Typical Cost Level | Why |
|---|---|---|
| One-Wall | Low | Fewer cabinets and shortest utilities |
| Galley / L-Shape | Medium | Balanced cabinet count, moderate labor |
| U-Shape | High | Maximum cabinets + complex plumbing/electrical |
| Island Kitchen | Highest | Extra counters, seating, lighting, wiring |
The type of cabinets you choose can affect both layout flexibility and cost. Stock cabinets fit simple layouts best, like one-wall or basic L-shapes. Semi-custom works well when you need more depth options or want better interior storage. Custom cabinets are ideal for tricky corners, uneven walls, oversized islands, or unique layout ideas you can’t build from standard sizes.
Quick guide
Stock: Budget-friendly, fast install, limited sizes
Semi-Custom: More finishes, flexible depths, better fit
Custom: Best for complex layouts or specialty appliances
Designing a layout in a new build gives you plenty of freedom, since utilities aren’t locked in yet. You can place the sink, vents, and outlets exactly where the layout works best. Remodeling a kitchen is different—existing plumbing, load-bearing walls, and HVAC lines can limit layout choices or raise the cost of moving things around.
Important differences
Remodeling often requires demo, rerouting utilities, and patching walls
New builds let you design around appliances, storage, and zones from the start
Older homes may have structural beams or tight clearances that shape the layout
You don’t need design experience to start planning a great kitchen layout. Online planners make it easy to drop in cabinets, change layouts, or test different styles before making big decisions. These tools create quick 2D and 3D views, so you can see how a galley, L-shape, or island layout would look in your space.
Popular options
IKEA Kitchen Planner – Great for simple layouts and budget-friendly cabinet planning.
Planner5D – Lets you build realistic 3D kitchen models and test layout ideas.
Home Depot Kitchen Designer – Helpful when comparing stock and semi-custom cabinet lines.
RoomSketcher – Easy drag-and-drop tool for detailed floor plans and full-room renderings.
These planners help you check aisle widths, island clearance, and appliance placement before committing to anything.
Online tools are helpful, but a professional designer can take your ideas and turn them into a fully optimized kitchen layout. They see details others often miss—workflow issues, bad lighting, oversized appliances, or cabinet depth problems.
What to ask your designer
“Is this layout efficient for my cooking style?”
“Are my aisles wide enough?”
“Where should outlets, vents, and plumbing go?”
“Can we add more storage without crowding the room?”
Tips for reviewing floor plan drafts
Always check traffic flow first.
Make sure appliances don’t block each other.
Confirm landing zones for the fridge, oven, and sink.
Look at cabinet depths in relation to walkways and islands.
A mix of online planners and expert input gives you the best balance of creativity, accuracy, and practicality.
Each kitchen layout—whether one-wall, galley, L-shape, U-shape, or island—works best for a specific type of space and lifestyle. The key is matching your room size, workflow needs, and daily habits to the right layout. Measure carefully, plan your zones, and study real examples to create a kitchen that feels efficient, comfortable, and truly yours.
Below are the filtered, relevant PAA questions (kitchen-layout–related) answered in a clear, expert, SEO-friendly format, based on your article + competitor insights (ElleDecor, BHG, Ikea, TheSpruce, KitchenAid, Caesarstone, CookSmarts, etc.).
Irrelevant questions (mostly color trends, interior-design 3F, etc.) are removed.
A: The galley kitchen is considered the most efficient because it places appliances, counters, and storage within easy reach on two parallel walls. This limits unnecessary movement and creates a strong “work zone” flow. Professional chefs often prefer this layout for pure efficiency.
A: Chefs prefer galley layouts or U-shaped layouts because these designs support the “mise en place” workflow. Everything stays within arm’s reach—tools, ingredients, prep areas, heat zones, and cleaning zones. Wide aisles (42–48") help two cooks work without collisions.
A: The most common modern layouts are:
One-wall
Galley
L-shape
U-shape
G-shape (peninsula)
Island kitchen (L or U with an island)
These appear consistently across BHG, Ikea, CliqStudios, and Caesarstone guides.
A: Traditional design books list five: one-wall, galley, L-shape, U-shape, and G-shape. Many modern guides now add island kitchens as a sixth layout because open-plan homes rely on them.
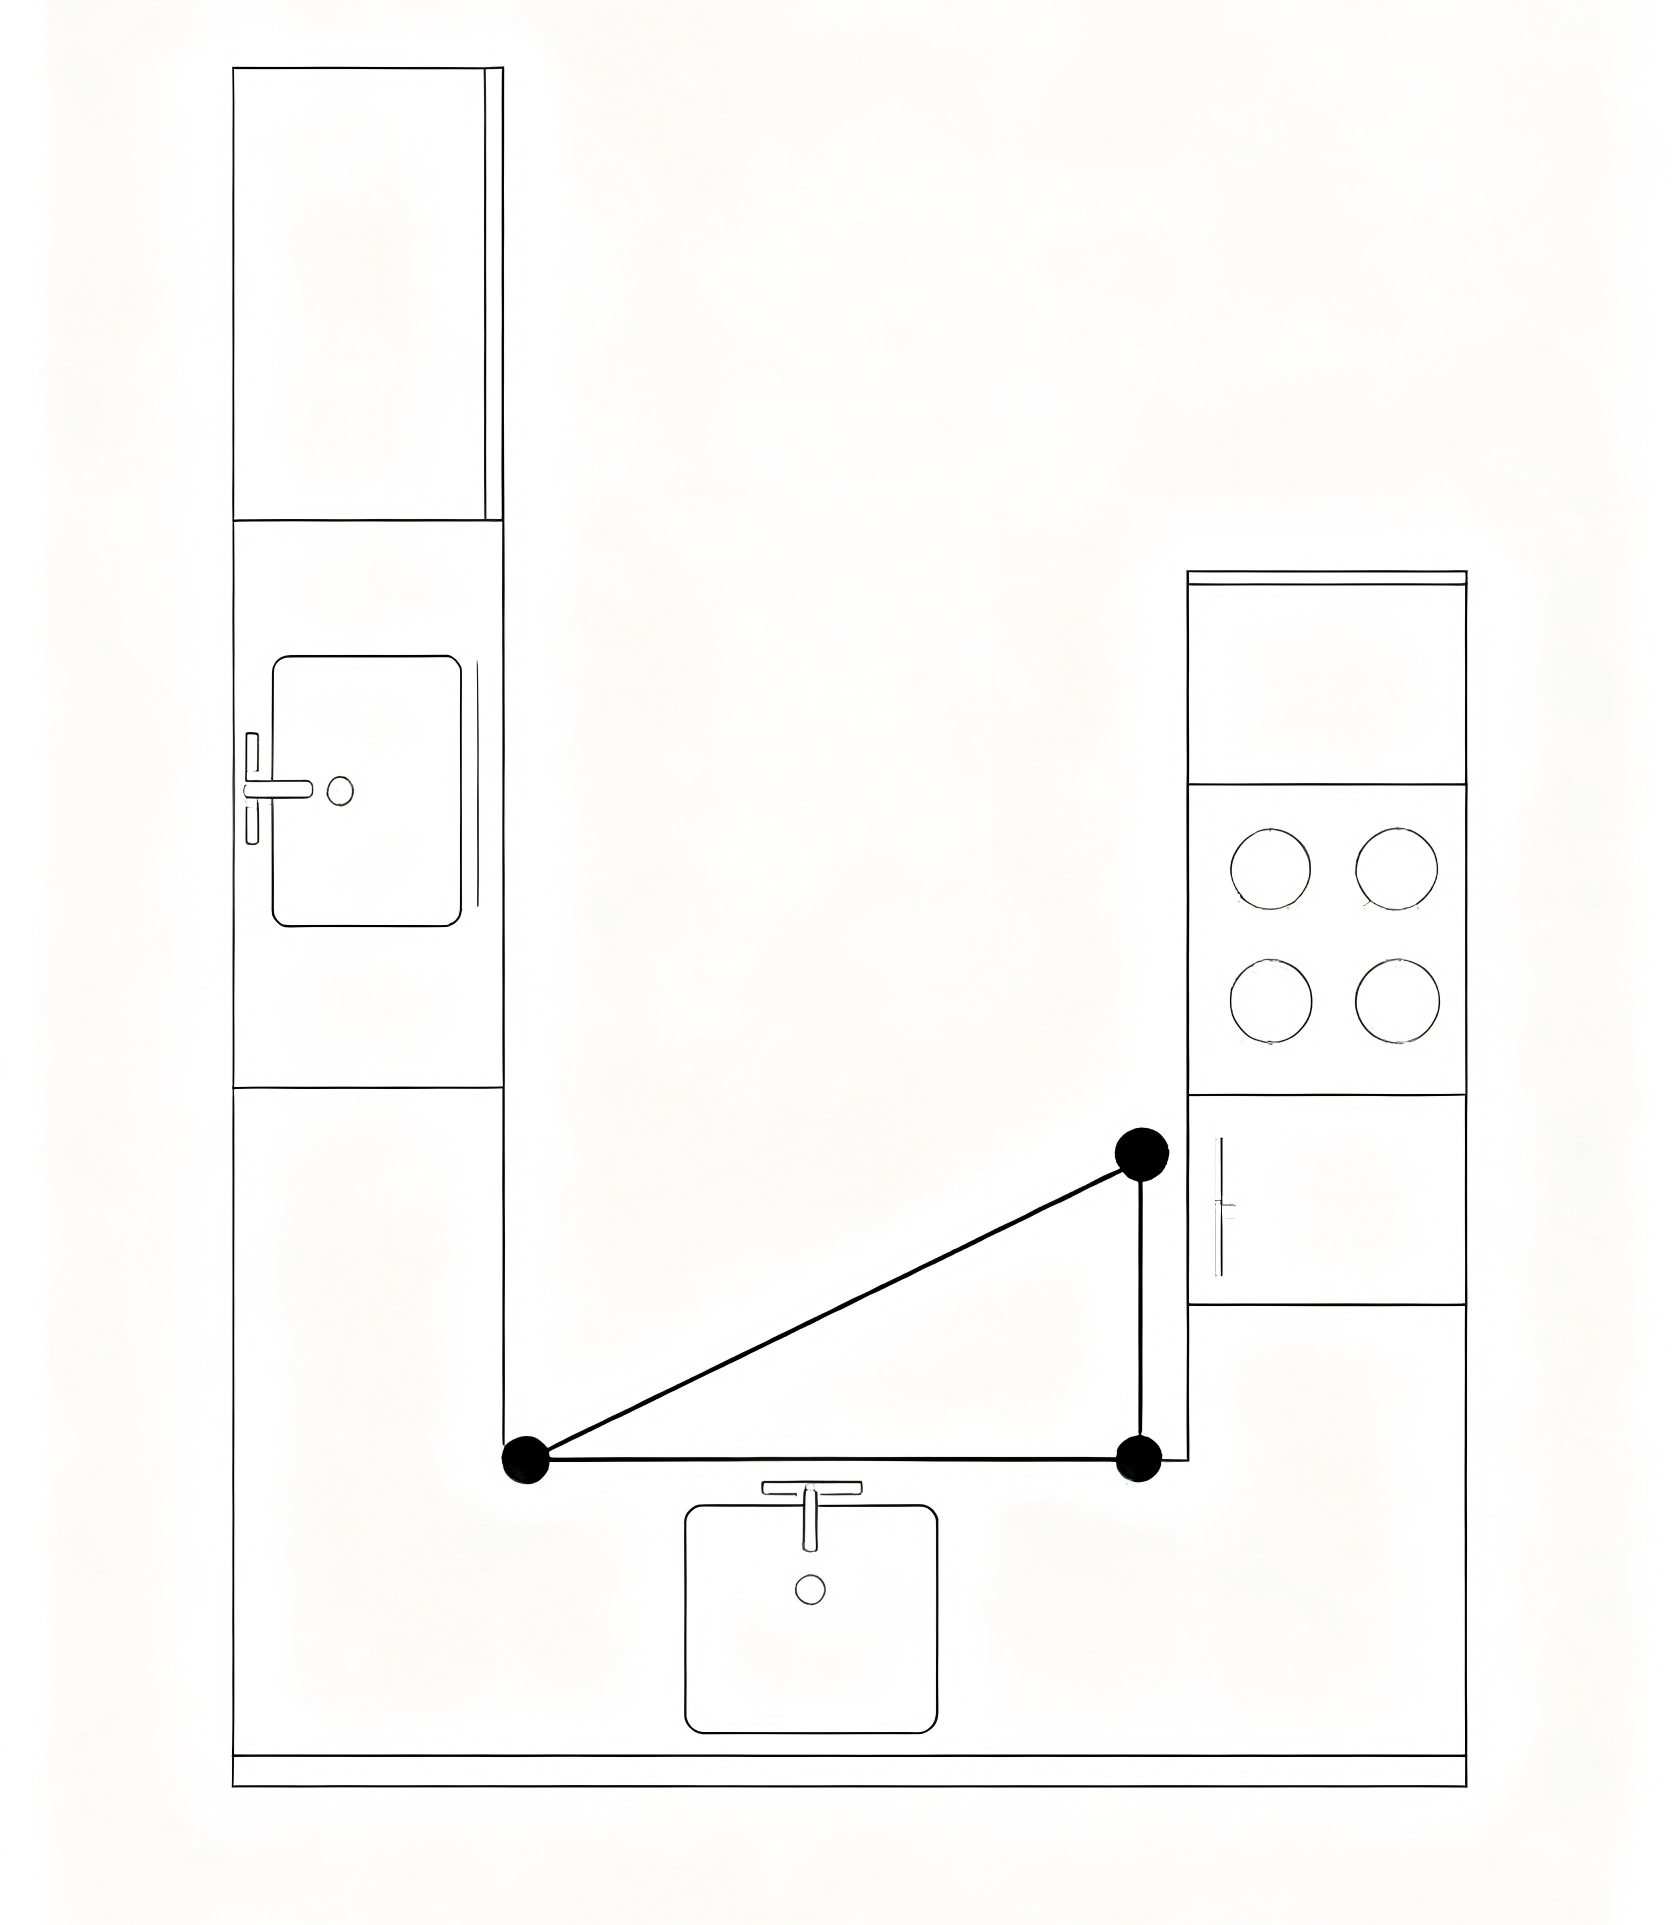
A: The classic golden rule is the work triangle—the distance between the fridge, sink, and cooktop should total 13–26 feet, with each leg 4–9 feet. Modern kitchens use “zones” instead, but the principle of reducing unnecessary movement still applies.
A: The golden ratio (roughly 1:1.6) is used to create visual balance in cabinet proportions, island size, or the spacing between features. For example, designers often size an island to be about 60% the length of the main countertop run to keep the room visually balanced.
A: It’s a classic color rule—not specific to layout.
60% dominant color (cabinets or walls)
30% secondary color (counters or island)
10% accent color (hardware, décor)
It helps keep the kitchen palette cohesive.
A: It can feel too rigid in modern kitchens, especially open-plan layouts where color needs to flow into other spaces. It may also limit bold or multi-tone designs like two-tone cabinets or mixed-material islands.
A: Use the zone method:
Prep zone → cutting boards, knives, mixing tools
Cooking zone → pots, pans, oils, spices
Cleaning zone → sink tools, trash, dishwasher pods
Storage zone → pantry goods, dishes, small appliances
Social zone → barware, snacks, seating
Place items where you naturally use them to reduce extra steps.
A: The fridge should sit near the kitchen entrance and close to the prep zone with 15–24 inches of landing space nearby. Avoid corners—fridge doors need room to swing. It should never block the cooking zone.
A: Open layouts—such as L-shape with island or U-shape with island—often raise home value. Buyers love kitchens with good flow, seating at the island, and clear zones for cooking and entertaining.
A: Standard countertop height is 36 inches, which suits most adults and works with standard 24-inch base cabinets and appliances. For baking or accessibility, lower counters (30–33 inches) may help.
A: The main rule is that kitchen aisles should be:
36" minimum
42" for standard use
48" for two cooks
This ensures safe movement and prevents congestion around appliances and islands.
A: The general guideline is to invest 10–15% of your home’s value in the kitchen. Always plan layout first, then appliances, then cabinets, and finally finishes. Good measurements prevent costly adjustments later.
A: A $10,000 budget is enough for a small, cosmetic upgrade—like repainting cabinets, new hardware, updated lighting, and a basic appliance swap. A full layout change or new cabinets usually costs more, especially for U-shape or island kitchens.


